
Summary:
If you’ve done any research on paver installation, you’ve probably seen guides recommending 4 to 6 inches of base material. That’s fine advice — for somewhere else. In Nassau County, where the soil holds water like a sponge and the ground freezes and thaws multiple times every winter, that depth isn’t enough. It’s one of the most common reasons patios and walkways in this area fail within a few years.
Clay soil isn’t a dealbreaker for pavers. But it does change how you approach the job. Get the base right and your pavers will outlast your concrete driveway by a decade or more. Skip the steps that matter here and you’ll be pulling them up sooner than you’d like. Here’s what the process actually looks like when you account for Nassau County’s specific conditions.
How to Prepare Clay Soil for Paver Installation
The foundation of any paver project is what you don’t see after it’s done — the base beneath the surface. In Nassau County’s clay-heavy soil, that base needs more thought than a standard installation guide will give it. Clay doesn’t drain. Water sits in it, saturates it, and when temperatures drop below freezing, that trapped moisture expands and pushes everything above it out of position.
The fix starts at the excavation stage, before a single piece of gravel goes in. And it requires going deeper than most people expect.
How Deep Should You Excavate for Pavers in Clay Soil?
For most of Nassau County — the Elmont, Valley Stream, Floral Park, and Franklin Square corridor sits on particularly dense glacial clay — the right excavation depth for a pedestrian patio or walkway is 8 to 10 inches. For a driveway, you’re looking at 12 to 14 inches. That’s significantly deeper than the 4 to 6 inches you’ll see in national guides, and the difference matters here in a way it might not in sandier soils further east in Suffolk County.
The reason is straightforward. Clay retains moisture. When that moisture freezes, it expands — water increases in volume by roughly 9 percent when it turns to ice. Do that repeatedly over a Long Island winter, with multiple freeze-thaw cycles rather than one clean freeze, and a shallow base that seemed solid in October becomes a shifting, uneven mess by March.
Once you’ve excavated to the right depth, the next step is laying a woven geotextile fabric directly on the subgrade before any gravel goes in. This fabric acts as a mechanical barrier between the clay below and your gravel base above. Without it, clay particles gradually migrate upward into the base material over time, slowly destroying its drainage capacity. The fabric keeps the two separated while still allowing water to pass through and drain away. Overlap any seams by at least 6 inches — a small detail that makes a real difference in long-term performance.
From there, your base material goes in as compacted crushed stone — 3/4-inch minus aggregate works well because the angular edges lock together when compacted. The critical thing here is that you can’t dump it all in and compact it at once. A standard plate compactor only effectively compacts about 4 inches of depth per pass. Add more than that and the bottom portion stays loose, which means it will settle later. Build the base in 3 to 4 inch lifts, compacting each one fully before adding the next. It takes more time, but it’s the step that determines whether your patio stays level five winters from now.
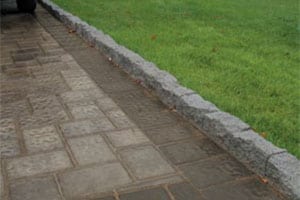
What to Use as a Bedding Layer Over a Clay Soil Base
Once your compacted gravel base is in place, you need a 1-inch bedding layer of coarse concrete sand before the pavers go down. This layer gives you a workable surface to set and level each paver, and it provides just enough flexibility to absorb minor movement without cracking.
One thing worth addressing directly: stone dust is not a substitute for coarse sand, even though it’s commonly used and easy to find. In Long Island’s wet climate, stone dust retains moisture rather than draining it. That retained moisture is exactly what you’re trying to eliminate from the base system. Coarse concrete sand drains properly and compacts correctly under the weight of pavers. It’s the right material for this step — not a preference, just what the application requires.
After the pavers are set, joint sand matters more than most people realize. Regular sand washes out during heavy rain. One good nor’easter and the joints are half-empty, which lets water reach the base and starts the cycle of instability all over again. Polymeric sand is the professional standard for a reason — it hardens when activated with water and stays in place through weather events. Sweep it into the joints, mist it with water, and it sets firm. It also significantly reduces weed growth, since there’s no loose material for seeds to take root in.
Edge restraints are another piece that sometimes gets skipped on DIY projects. Without them, the pavers at the perimeter have nothing holding them in from the sides, and they slowly migrate outward over time. Install edge restraints before you start laying pavers, and spike them into the base at regular intervals. The whole system — base, bedding, pavers, joints, and edges — works together. Weaken any one part and the others compensate less than you’d expect.
Paver Drainage Solutions for Long Island's Clay-Heavy Yards
Drainage is where a lot of Nassau County paver projects run into trouble, and it’s usually because the drainage plan was either minimal or nonexistent. Clay soil doesn’t absorb water the way sandy soil does. When it rains heavily — or when spring snowmelt hits all at once — that water has to go somewhere. If your paver system isn’t designed to move it away from the surface and the base, it will find its own path, and that path usually runs right through your base material.
Getting drainage right isn’t complicated, but it does require intentional decisions at several stages of the project.
How to Slope Pavers for Proper Surface Drainage
Surface drainage starts with slope. Every paver installation needs a minimum grade of 2 percent — roughly 1/4 inch of drop per foot — to move water off the surface and away from structures. For the first 4 feet adjacent to a house or foundation, that slope should be consistent and deliberate. Water that pools near a foundation creates problems well beyond the patio itself.
The slope gets established during base preparation, not after the pavers are down. Once you’re screeding the bedding sand, you’re working with the grade you’ve already built into the base. Trying to correct slope at the sand layer is imprecise and usually leads to uneven results. Set the grade at the compacted gravel stage, check it with a level and a string line, and the rest of the process follows from there.
In Nassau County, where summer thunderstorms can drop significant rainfall in a short window, a 2 percent slope is the floor, not the target. If you’re working with a large patio area or a yard that already drains poorly, building in a slightly steeper grade where the layout allows gives you more margin. Water that moves off the surface quickly doesn’t have time to penetrate joints or pool at the edges where it can undermine the base.
One thing that catches people off guard is how much the surrounding landscape affects paver drainage. A patio that drains well in isolation can still develop pooling problems if the yard around it slopes toward it, or if downspouts discharge nearby. Walk the area after a rain before you start planning — understanding where water naturally flows on your property is the most useful information you can have going into the design phase.
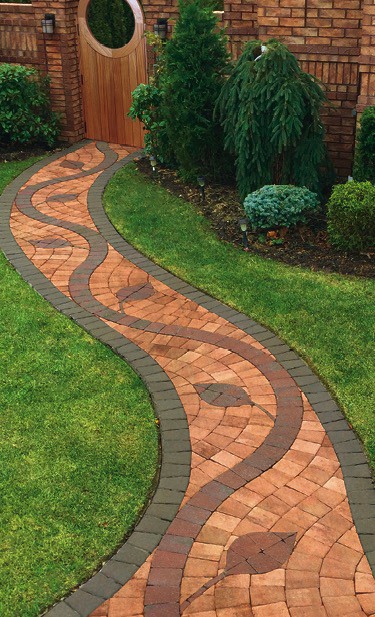
When to Add a French Drain or Subsurface Drainage to a Paver Project
Surface slope handles water that falls on the pavers. It doesn’t handle water that comes from below — groundwater that rises in clay soil after prolonged rain, or water that migrates laterally from neighboring properties. In parts of Nassau County where yards are small, lots are close together, and clay soil is dense, subsurface drainage is often the difference between a paver installation that performs well long-term and one that develops problems within a few seasons.
A French drain is the most common solution. It’s a trench — typically 12 to 18 inches deep — filled with gravel and containing a perforated pipe that collects water and directs it to a discharge point away from the patio area. In clay-heavy soil, a French drain installed along the uphill or upslope edge of a patio intercepts water before it reaches the base, reducing the saturation that leads to frost heave and settling. It’s not a complex system, but it needs to be sized and positioned correctly to do its job.
For patios where water consistently pools in the joints or the surface stays wet long after rain stops, a subsurface drainage layer within the paver system itself is worth considering. An open-graded base — coarser aggregate that allows water to move through it freely — combined with a permeable bedding layer lets water drain vertically through the system rather than sitting in it. This approach is more involved than a standard base, but in areas with persistent drainage problems, it addresses the issue at the source rather than managing the symptoms.
The geotextile fabric mentioned earlier plays a role in subsurface drainage too. In addition to separating the clay subgrade from the base material, it prevents fine particles from clogging the drainage layers over time. A drainage system that works in year one but clogs in year five isn’t really a drainage system — it’s a delayed problem. Fabric installed correctly at the subgrade level keeps the drainage path open for the life of the installation.
If you’re unsure whether your yard needs additional drainage beyond surface slope, the honest answer is to look at what happens during a heavy rain. If water pools on or around your existing patio or lawn for more than a few hours after a storm, your clay soil isn’t moving water fast enough on its own, and your paver installation will need help doing it.
Where to Find the Right Materials for Your Nassau County Paver Project
The steps in this guide aren’t complicated, but they do require the right materials executed in the right order. In Nassau County’s clay soil conditions, there’s very little margin for substitutions — the wrong base depth, the wrong sand, or skipped drainage planning shows up within a season or two, usually right after winter.
We’ve been supplying paver projects across Nassau County and Queens from our location at 747 Meacham Avenue in Elmont since 1956. Our staff has seen what holds up here and what doesn’t, and we carry the full Cambridge Pavingstone line — including ArmorTec pavers backed by a transferable lifetime warranty — along with every material and tool the installation requires. The public is welcome, and if you walk in with questions, we’ll help you figure out exactly what your project needs.
If you’re planning a paver project in the Elmont, Valley Stream, Floral Park, or Five Towns area, stop by or give us a call. We’re open Monday through Friday 7AM to 5PM and Saturday 7AM to 2PM.